尚硅谷大数据技术之Hadoop(MapReduce)(新)第1章 MapReduce概述
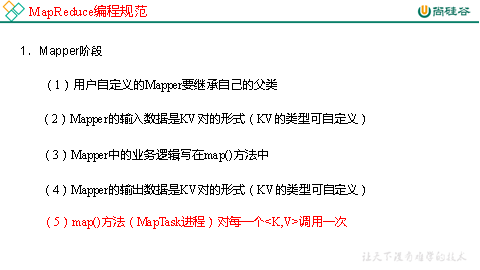
1.7 MapReduce编程规范
用户编写的程序分成三个部分:Mapper、Reducer和Driver。

 1.8 WordCount案例实操
1.需求
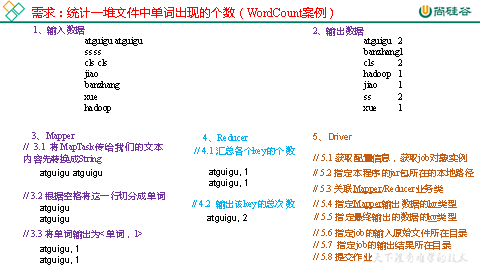
在给定的文本文件中统计输出每一个单词出现的总次数
(1)输入数据
atguigu atguigu
ss ss
cls cls
jiao
banzhang
xue
hadoop
(2)期望输出数据
atguigu 2
banzhang 1
cls 2
hadoop 1
jiao 1
ss 2
xue 1
2.需求分析
按照MapReduce编程规范,分别编写Mapper,Reducer,Driver,如图4-2所示。

图4-2 需求分析
3.环境准备
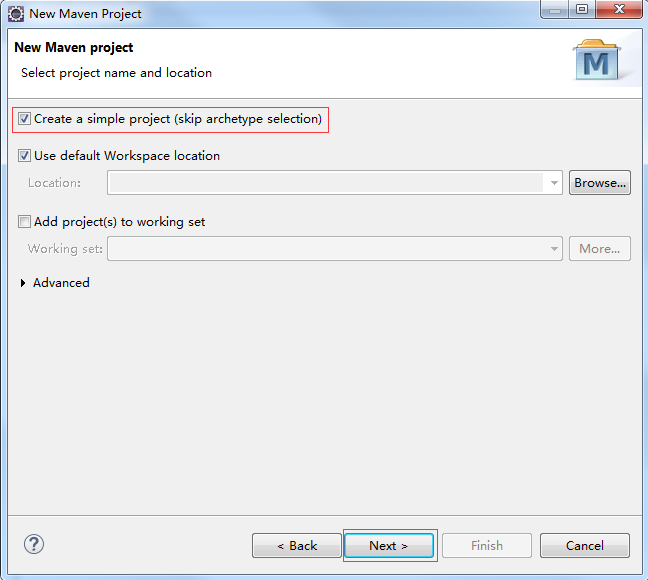
(1)创建maven工程


(2)在pom.xml文件中添加如下依赖
<dependencies>
<dependency>
<groupId>junit</groupId>
<artifactId>junit</artifactId>
<version>RELEASE</version>
</dependency>
<dependency>
<groupId>org.apache.logging.log4j</groupId>
<artifactId>log4j-core</artifactId>
<version>2.8.2</version>
</dependency>
<dependency>
<groupId>org.apache.hadoop</groupId>
<artifactId>hadoop-common</artifactId>
<version>2.7.2</version>
</dependency>
<dependency>
<groupId>org.apache.hadoop</groupId>
<artifactId>hadoop-client</artifactId>
<version>2.7.2</version>
</dependency>
<dependency>
<groupId>org.apache.hadoop</groupId>
<artifactId>hadoop-hdfs</artifactId>
<version>2.7.2</version>
</dependency>
</dependencies>
(2)在项目的src/main/resources目录下,新建一个文件,命名为“log4j.properties”,在文件中填入。
|
log4j.rootLogger=INFO, stdout log4j.appender.stdout=org.apache.log4j.ConsoleAppender log4j.appender.stdout.layout=org.apache.log4j.PatternLayout log4j.appender.stdout.layout.ConversionPattern=%d %p [%c] - %m%n log4j.appender.logfile=org.apache.log4j.FileAppender log4j.appender.logfile.File=target/spring.log log4j.appender.logfile.layout=org.apache.log4j.PatternLayout log4j.appender.logfile.layout.ConversionPattern=%d %p [%c] - %m%n |
4.编写程序
(1)编写Mapper类
|
package com.atguigu.mapreduce; import java.io.IOException; import org.apache.hadoop.io.IntWritable; import org.apache.hadoop.io.LongWritable; import org.apache.hadoop.io.Text; import org.apache.hadoop.mapreduce.Mapper;
public class WordcountMapper extends Mapper<LongWritable, Text, Text, IntWritable>{ Text k = new Text(); IntWritable v = new IntWritable(1); @Override protected void map(LongWritable key, Text value, Context context) throws IOException, InterruptedException { // 1 获取一行 String line = value.toString(); // 2 切割 String[] words = line.split(" "); // 3 输出 for (String word : words) { k.set(word); context.write(k, v); } } } |
(2)编写Reducer类
|
package com.atguigu.mapreduce.wordcount; import java.io.IOException; import org.apache.hadoop.io.IntWritable; import org.apache.hadoop.io.Text; import org.apache.hadoop.mapreduce.Reducer;
public class WordcountReducer extends Reducer<Text, IntWritable, Text, IntWritable>{
int sum; IntWritable v = new IntWritable();
@Override protected void reduce(Text key, Iterable<IntWritable> values,Context context) throws IOException, InterruptedException { // 1 累加求和 sum = 0; for (IntWritable count : values) { sum += count.get(); } // 2 输出 v.set(sum); context.write(key,v); } } |
(3)编写Driver驱动类
|
package com.atguigu.mapreduce.wordcount; import java.io.IOException; import org.apache.hadoop.conf.Configuration; import org.apache.hadoop.fs.Path; import org.apache.hadoop.io.IntWritable; import org.apache.hadoop.io.Text; import org.apache.hadoop.mapreduce.Job; import org.apache.hadoop.mapreduce.lib.input.FileInputFormat; import org.apache.hadoop.mapreduce.lib.output.FileOutputFormat;
public class WordcountDriver {
public static void main(String[] args) throws IOException, ClassNotFoundException, InterruptedException {
// 1 获取配置信息以及封装任务 Configuration configuration = new Configuration(); Job job = Job.getInstance(configuration);
// 2 设置jar加载路径 job.setJarByClass(WordcountDriver.class);
// 3 设置map和reduce类 job.setMapperClass(WordcountMapper.class); job.setReducerClass(WordcountReducer.class);
// 4 设置map输出 job.setMapOutputKeyClass(Text.class); job.setMapOutputValueClass(IntWritable.class);
// 5 设置最终输出kv类型 job.setOutputKeyClass(Text.class); job.setOutputValueClass(IntWritable.class); // 6 设置输入和输出路径 FileInputFormat.setInputPaths(job, new Path(args[0])); FileOutputFormat.setOutputPath(job, new Path(args[1]));
// 7 提交 boolean result = job.waitForCompletion(true);
System.exit(result ? 0 : 1); } } |
5.本地测试
(1)如果电脑系统是win7的就将win7的hadoop jar包解压到非中文路径,并在Windows环境上配置HADOOP_HOME环境变量。如果是电脑win10操作系统,就解压win10的hadoop jar包,并配置HADOOP_HOME环境变量。
注意:win8电脑和win10家庭版操作系统可能有问题,需要重新编译源码或者更改操作系统。

(2)在Eclipse/Idea上运行程序
6.集群上测试
(0)用maven打jar包,需要添加的打包插件依赖
注意:标记红颜色的部分需要替换为自己工程主类
<build>
<plugins>
<plugin>
<artifactId>maven-compiler-plugin</artifactId>
<version>2.3.2</version>
<configuration>
<source>1.8</source>
<target>1.8</target>
</configuration>
</plugin>
<plugin>
<artifactId>maven-assembly-plugin </artifactId>
<configuration>
<descriptorRefs>
<descriptorRef>jar-with-dependencies</descriptorRef>
</descriptorRefs>
<archive>
<manifest>
<mainClass>com.atguigu.mr.WordcountDriver</mainClass>
</manifest>
</archive>
</configuration>
<executions>
<execution>
<id>make-assembly</id>
<phase>package</phase>
<goals>
<goal>single</goal>
</goals>
</execution>
</executions>
</plugin>
</plugins>
</build>
注意:如果工程上显示红叉。在项目上右键->maven->update project即可。
(1)将程序打成jar包,然后拷贝到Hadoop集群中
步骤详情:右键->Run as->maven install。等待编译完成就会在项目的target文件夹中生成jar包。如果看不到。在项目上右键-》Refresh,即可看到。修改不带依赖的jar包名称为wc.jar,并拷贝该jar包到Hadoop集群。
(2)启动Hadoop集群
(3)执行WordCount程序
[atguigu@hadoop102 software]$ hadoop jar wc.jar
com.atguigu.wordcount.WordcountDriver /user/atguigu/input /user/atguigu/output


